
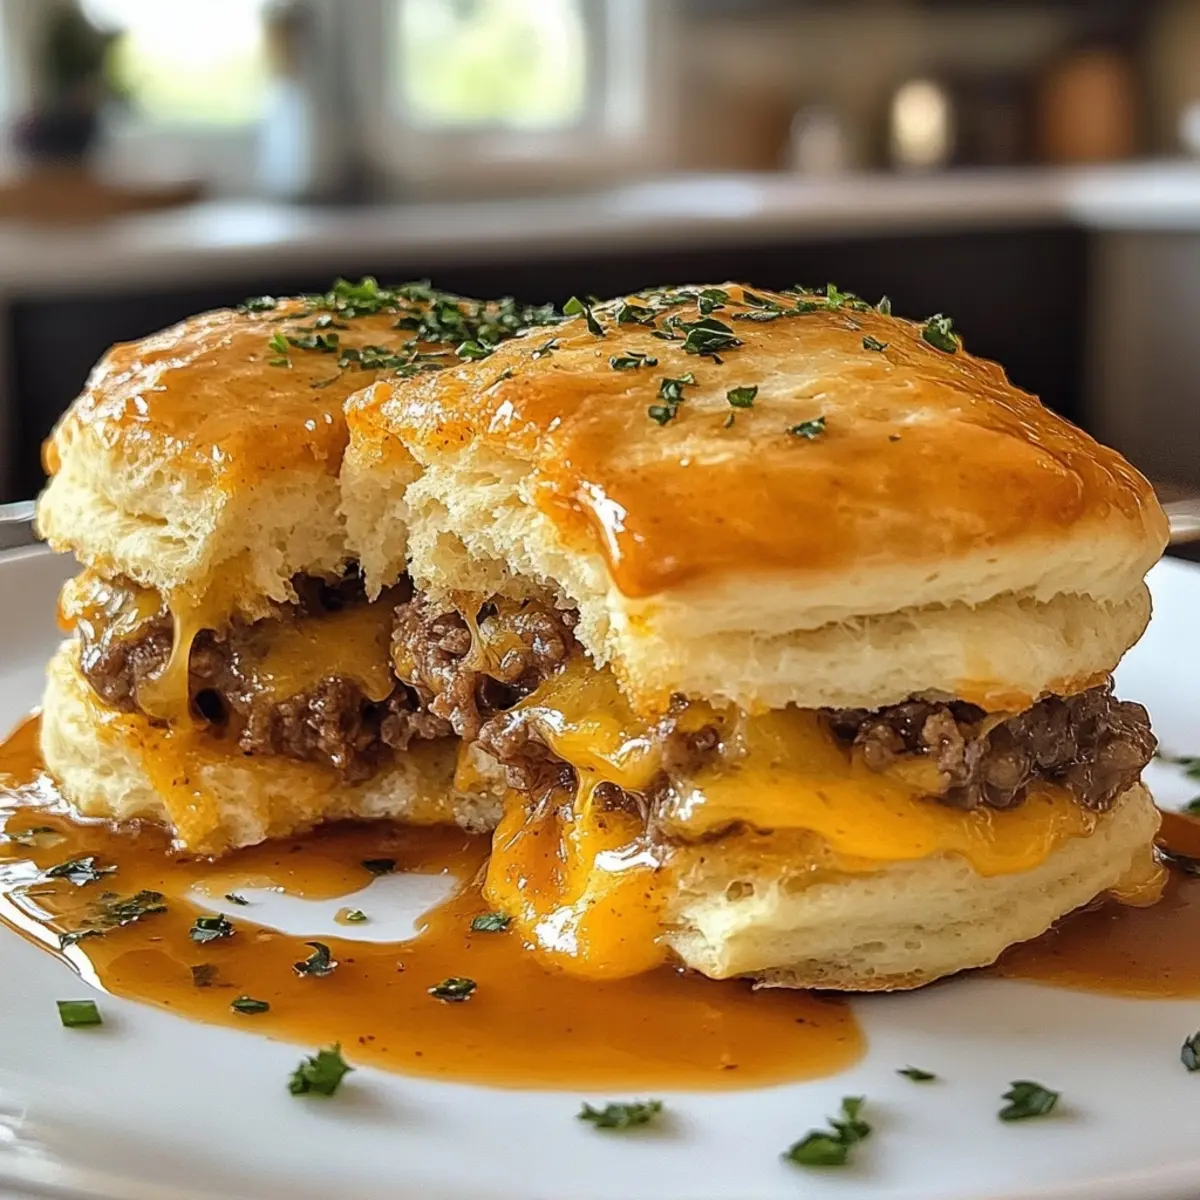
There’s something undeniably comforting about the aroma of freshly baked biscuits, especially when they’re stuffed with savory ground beef and melted cheese. As I pulled these Cheesy Beef Biscuit Bombs out of the oven, the golden crust crackled enticingly, promising a gooey, delicious filling with each bite. You’ll be amazed at how these delightful morsels can turn an ordinary weeknight dinner into a delicious experience that feels like a special occasion.
Perfect as a snack for game day or a hearty meal any time of day, these cheesy bombs are as versatile as they are satisfying. Whether you’re hosting friends or just treating yourself to something indulgent, these easy-to-make bites will surely impress. With minimal effort, you’ll have a crowd-pleasing dish that combines crispy textures and rich flavors—an absolute win in my kitchen! Get ready to savor the goodness that these homemade treats bring, because once you bite into them, you may not be able to stop at just one!
Why are Cheesy Beef Biscuit Bombs a must-try?
Melt-in-your-mouth goodness: These cheesy beef biscuit bombs deliver an indulgent burst of flavor with every savory bite.
Easy preparation: With simple ingredients and straightforward steps, even kitchen novices can impress guests.
Versatile delights: Perfect for game-day snacks or a satisfying weeknight dinner that’ll please any palate.
Crowd-pleaser: Everyone loves the golden, crispy exterior paired with a gooey, cheesy filling, making them irresistible!
Explore similar delicious options like Chipped Beef Cheese for variety in your menu!
Cheesy Beef Biscuit Bombs Ingredients
• Get ready to create comfort food magic!
For the Filling
• Ground beef – Provides a rich, savory filling with hearty texture. Can be replaced with ground turkey or chicken for a lighter option.
• Shredded cheddar cheese – The star ingredient; creates a gooey center balancing the beef’s richness. Feel free to substitute with mozzarella or Monterey Jack for different flavors.
• Cream cheese (softened) – Adds creamy texture, binding the mixture together and achieving a smooth consistency.
• Grated Parmesan cheese – Enhances flavor profile with a salty kick; consider it optional but highly recommended.
• Garlic powder – Adds a subtle depth of flavor and aroma to the filling. Fresh garlic could be used for a stronger taste.
• Onion powder – Provides sweetness and savory depth; fresh onion could be substituted but may need longer cooking time.
• Black pepper – Introduces mild heat to balance the richness of the filling. Adjust to taste.
For the Biscuit Bombs
• Refrigerated biscuit dough – The vessel for the filling; bakes up soft and flaky with a crispy exterior, essential for structure.
• Melted butter – Brushed on for a golden, crispy finish and enhances overall flavor.
Prepare to whip up these cheesy beef biscuit bombs that are sure to become a beloved addition to your homemade snack list!
How to Make Cheesy Beef Biscuit Bombs
- Preheat oven: Begin by preheating your oven to 375°F (190°C) so it’s ready for baking these delicious bites! This ensures a perfectly baked exterior.
- Cook beef: In a skillet over medium heat, cook the ground beef until it’s browned, which should take about 6-8 minutes. Stir occasionally for even cooking and flavor.
- Drain and season: Once browned, drain any excess grease from the pan. Return the beef to the heat and stir in the garlic powder, onion powder, and black pepper, cooking for an additional 1-2 minutes to enhance the flavors.
- Cool slightly: Remove the skillet from heat and let the beef mixture cool for a few moments. This helps prevent the cream cheese from melting too much later.
- Mix cheese filling: In a separate bowl, combine the softened cream cheese, shredded cheddar cheese, and grated Parmesan. Mix until well blended and creamy.
- Combine fillings: Gently fold in the cooled beef mixture with the cheese mixture until thoroughly combined. The flavors will meld together beautifully!
- Prepare biscuit dough: Separate the refrigerated biscuit dough and flatten each piece into a disk using your hands or a rolling pin.
- Fill and seal: Place a spoonful of the cheesy beef filling in the center of each biscuit disk. Fold the dough over the filling and pinch or seal the edges to ensure the goodness stays inside.
- Arrange and brush: Place your sealed biscuit bombs on a baking sheet lined with parchment paper. Brush the tops generously with melted butter to achieve that golden, crispy finish.
- Bake: Bake in the preheated oven for 12-15 minutes, or until the biscuit bombs are puffed up and golden brown. Your kitchen will smell amazing!
- Cool slightly: Once baked, allow them to cool for just a few minutes before serving—this will help them hold their shape.
Optional: Serve with warm marinara sauce for dipping or alongside a fresh salad for a balanced meal.
Exact quantities are listed in the recipe card below.
How to Store and Freeze Cheesy Beef Biscuit Bombs
Fridge: Keep leftover cheesy beef biscuit bombs in an airtight container for up to 3-4 days to maintain their freshness and flavor.
Freezer: For longer storage, freeze the biscuit bombs for up to 3 months. Wrap each one in plastic wrap and place them in a freezer-safe bag.
Reheating: When ready to enjoy, reheat in the oven at 350°F (175°C) for about 15-20 minutes, which helps restore their crispy texture and gooey filling.
Make-Ahead Tips: Preparing these cheesy beef biscuit bombs in advance makes them a perfect party snack or quick meal option for busy nights!
Cheesy Beef Biscuit Bombs Variations
Feel free to get creative and make these cheesy beef biscuit bombs your own with these fun ideas!
- Dairy-Free: Substitute the cream cheese and cheddar with dairy-free alternatives like cashew cheese or plant-based cream cheese for a delicious twist.
- Spicy Kick: Add chopped jalapeños or a dash of hot sauce to the filling for an extra layer of heat that’ll excite your taste buds.
- Vegetable Boost: Mix in finely chopped bell peppers, spinach, or mushrooms to the beef mixture for added nutrition and flavor—flecks of color make each bomb even more inviting!
- Cheese Swaps: Experiment with a blend of cheeses such as pepper jack for a zesty kick or gouda for a smoky touch, creating a unique flavor profile each time.
- Herb Infused: Add fresh herbs like cilantro or chives to the cheese mixture for a burst of freshness that lightens the overall richness.
- Sweet Surprise: Incorporate a spoonful of corn or a touch of barbecue sauce into the beef filling to balance savory and sweet elements, creating a delightful flavor contrast.
- Gluten-Free: Use gluten-free biscuit dough to cater to dietary needs while maintaining that comforting experience in every bite.
- Tex-Mex Flair: Mix in taco seasoning with the beef and cheese, and serve with salsa for a twist that transports your taste buds south of the border.
Expert Tips for Cheesy Beef Biscuit Bombs
- Seasoned Beef: Ensure the ground beef is well-seasoned; this enhances the flavor profile and prevents bland filling.
- Cool Before Mixing: Allow the beef mixture to cool before combining it with cream cheese; this maintains the right texture for the filling.
- Sealing Edges: Make sure to pinch or seal the edges of the biscuit dough firmly; this prevents the filling from leaking during baking.
- Baking Perfection: For a golden crust, brush all the biscuit bombs with melted butter before baking; it’s key to achieving that perfect crispy finish.
- Make-Ahead Option: Prepare the biscuits in advance and refrigerate them; just pop them in the oven when you’re ready for warm, homemade cheesy beef biscuit bombs.
What to Serve with Cheesy Beef Biscuit Bombs?
These scrumptious bites bring comfort food to life and pair well with a variety of sides for a wholesome meal.
- Warm Marinara Sauce: This classic pairing complements the cheesy richness with a tangy, zesty touch perfect for dipping.
- Crunchy Side Salad: A fresh salad with crisp lettuce, cucumber, and a light vinaigrette balances the savory bites beautifully.
- Roasted Vegetables: Add a side of colorful roasted veggies for a pop of flavor and nutrition, enhancing the dish’s overall appeal.
- Creamy Coleslaw: The cool, creamy texture of cole slaw provides a delightful contrast to the hot cheesy filling. A refreshing choice for summer gatherings!
- Garlic Breadsticks: Soft, buttery breadsticks offer an extra touch of comfort alongside the bomb’s deliciousness, inviting everyone to linger at the dinner table.
- Potato Wedges: Crispy, seasoned potato wedges are an indulgent side, allowing for dipping and enjoying that crunchy texture alongside the biscuit bombs.
Indulging in any of these options will surely elevate your dining experience featuring the cheesy beef biscuit bombs!
Cheesy Beef Biscuit Bombs Recipe FAQs
How do I select the best ground beef?
Absolutely! When selecting ground beef for your cheesy beef biscuit bombs, look for meat that is bright red with minimal dark spots and a good amount of marbling. Choose beef with a fat content of around 80/20 for extra moisture and flavor. If you’re opting for a healthier option, ground turkey or chicken can work just as well.
How should I store leftover cheesy beef biscuit bombs?
Very! Store your leftover cheesy beef biscuit bombs in an airtight container in the refrigerator for 3-4 days. Make sure they’re completely cooled before you seal them up to keep them fresh and delicious. If you want to preserve them longer, consider freezing them.
Can I freeze cheesy beef biscuit bombs? What’s the best method?
For sure! To freeze your cheesy beef biscuit bombs, wrap each one tightly in plastic wrap and then place them in a freezer-safe bag. They can be kept in the freezer for up to 3 months. When you’re ready to enjoy them, simply bake them straight from the freezer at 350°F (175°C) for about 15-20 minutes, or until golden brown and heated through.
Why are my biscuit bombs leaking during baking?
Oh no, that can happen! If your cheesy beef mixture is too full or if the edges of the biscuit dough aren’t correctly sealed, the filling may leak out. To avoid this, make sure to pinch the edges firmly after folding the dough over the filling and don’t overstuff. A well-sealed bomb ensures maximum gooey inside and a crispy outside!
Can my pets eat cheesy beef biscuit bombs?
While it might be tempting to share delicious cheesy beef biscuit bombs with your furry friends, it’s best not to. The seasonings and cheese can be too rich and may not sit well with their digestive systems. Stick to pet-friendly treats for your four-legged companions!
What can I do if my filling is too runny?
Great question! If your filling turns out too runny, try adding a small amount of breadcrumbs or crushed crackers to thicken it up. You could also let the mixture sit in the fridge for about 30 minutes, which helps solidify the filling as it cools, making it easier to scoop into your biscuit dough.

Irresistibly Cheesy Beef Biscuit Bombs for Comfort Food Bliss
Equipment
- skillet
- Oven
- Baking Sheet
- Parchment Paper
Ingredients
For the Filling
- 1 pound Ground beef Can be replaced with ground turkey or chicken
- 1 cup Shredded cheddar cheese Substitute with mozzarella or Monterey Jack if preferred
- 8 ounces Cream cheese Softened
- 1/4 cup Grated Parmesan cheese Optional but recommended
- 1 teaspoon Garlic powder Fresh garlic can be used for stronger flavor
- 1 teaspoon Onion powder Fresh onion can be substituted
- 1/2 teaspoon Black pepper Adjust to taste
For the Biscuit Bombs
- 2 cans Refrigerated biscuit dough Essential for structure
- 1/4 cup Melted butter For brushing
Instructions
How to Make Cheesy Beef Biscuit Bombs
- Preheat the oven to 375°F (190°C).
- In a skillet over medium heat, cook the ground beef until browned (6-8 minutes).
- Drain excess grease, stir in garlic powder, onion powder, and black pepper, and cook for an additional 1-2 minutes.
- Remove from heat and let the beef mixture cool slightly.
- In a separate bowl, mix softened cream cheese, shredded cheddar cheese, and grated Parmesan until creamy.
- Fold in the cooled beef mixture with the cheese mixture until combined.
- Separate and flatten each piece of refrigerated biscuit dough.
- Place a spoonful of the filling in the center of each disk, fold dough over filling, and seal edges.
- Arrange sealed bombs on a parchment-lined baking sheet and brush tops with melted butter.
- Bake for 12-15 minutes or until puffed and golden brown.
- Cool slightly before serving.
Notes


Leave a Comment